Table of Content
Click on the knot name to visualize the instructions.
| Photo | Symbol | Name |
|---|---|---|
 |  | Lark’s Head |
 |  | Reverse Lark’s Head |
 |  | Mounting Knot |
 |  | Double Half Hitch |
 |  | Reverse Double Half Hitch |
 | | Tatting Knot |
 |  | Square Knot |
 |  | Overhand Knot |
 |  | Slip Knot |
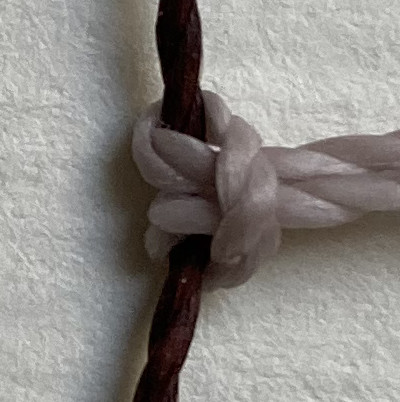
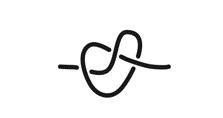
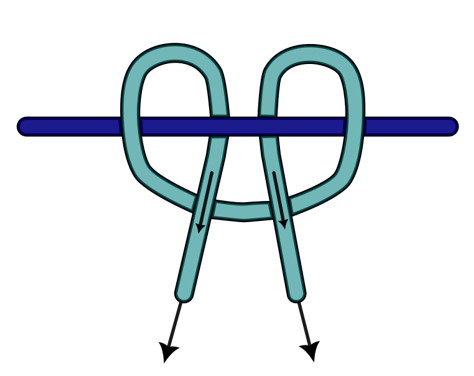
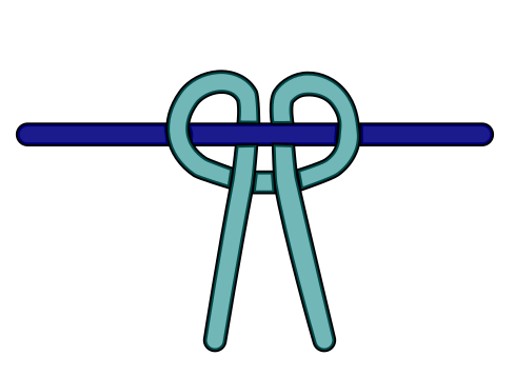
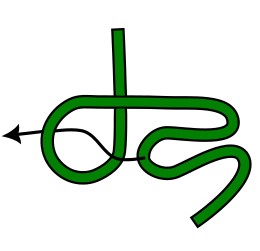
Lark’s Head Knot
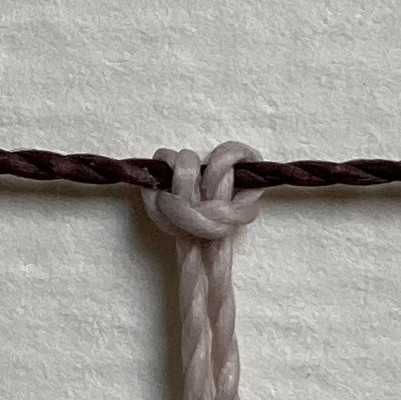
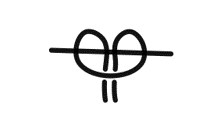
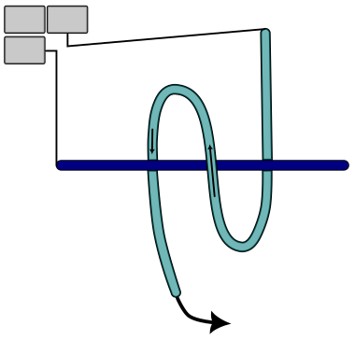
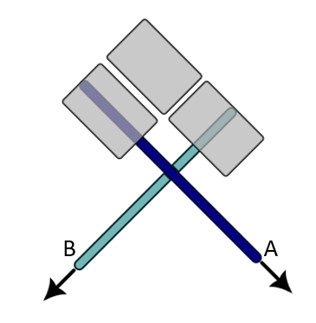
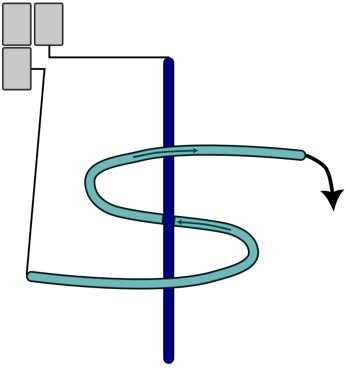
The lark’s head knot, is used to mount the knotting cords on a support. The knot itself has the same shape as a tatting knot, which we’ll see later.
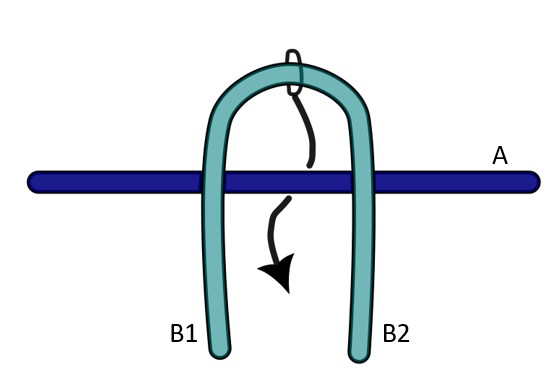
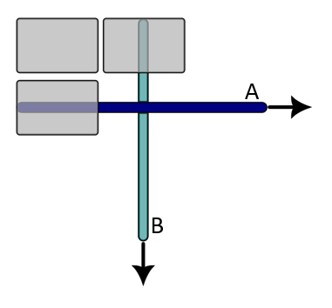
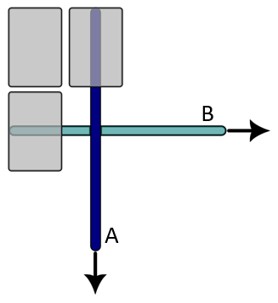
A is the anchor cord.
B is the knotting cord.
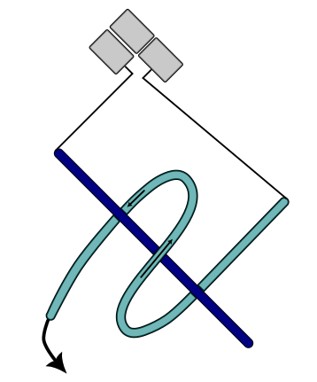
Fold the knotting cord in half and place it over the knotting cord. Take the bight formed and bring it downwards, behind the anchor cord.
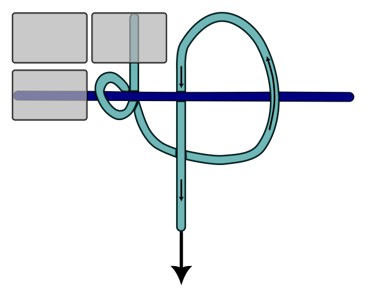
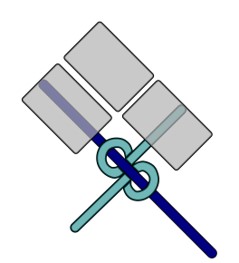
Take the knotting cord ends and insert them into the loop.
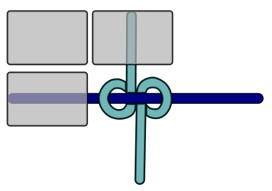
Pull the knotting cords to tighten the knot.
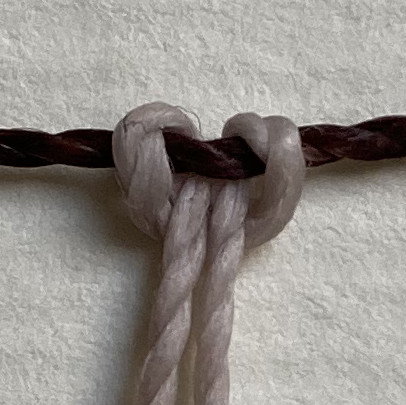
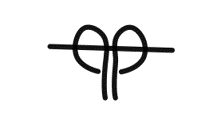
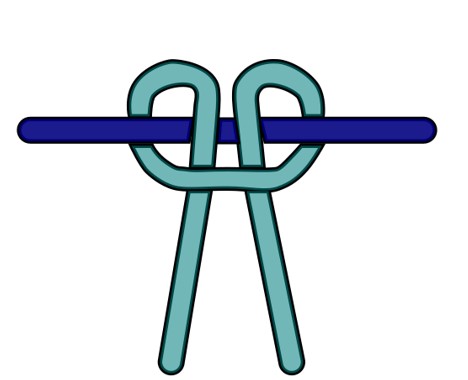
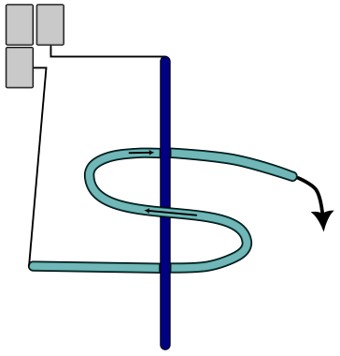
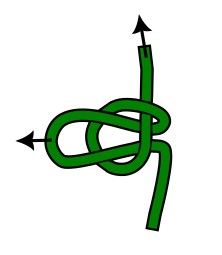
Reverse Lark’s Head Knot
The reversed lark’s head knot is the central component of the mounting knot.
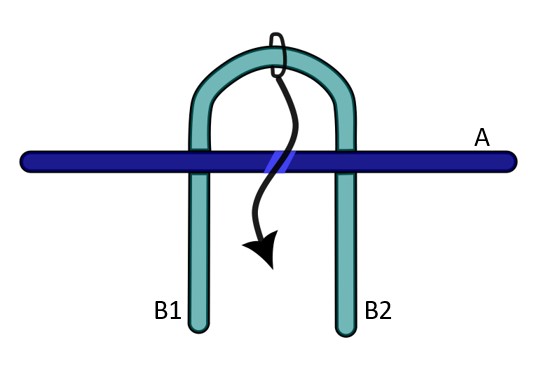
A is the anchor cord.
B is the knotting cord.
Fold the knotting cord in half and place it under the anchor cord. Take the bight formed by the fold and bring it downwards, in front of the anchor cord.
Take the knotting cord’s ends and insert them from underneath into the folded loop.
Pull the knotting cords to tighten the knot.
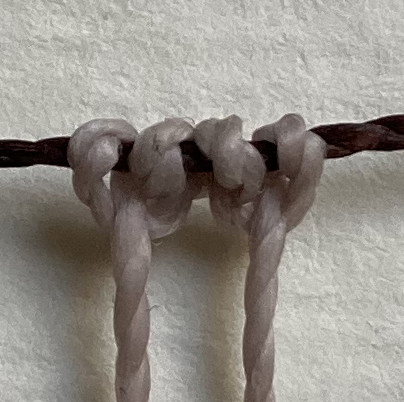
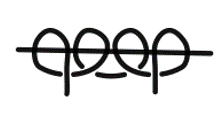
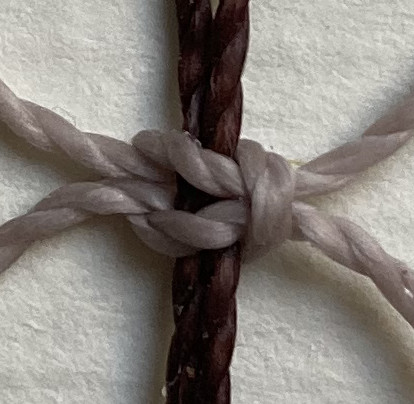
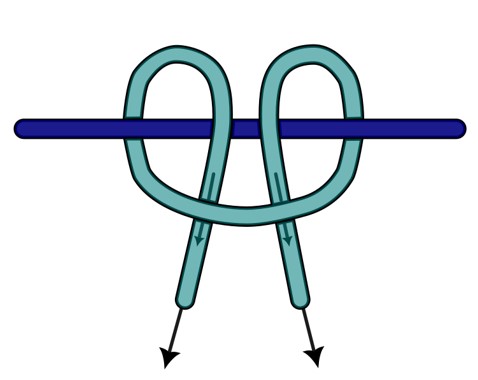
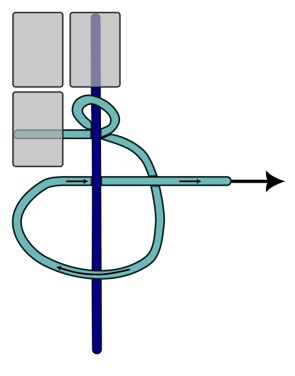
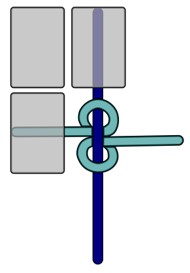
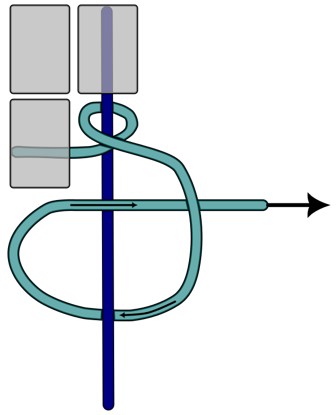
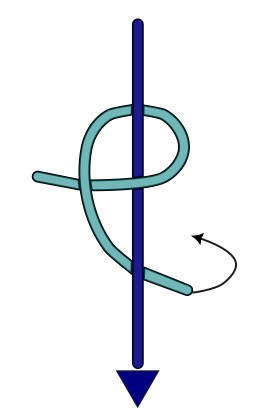
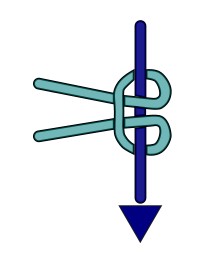
Mounting Knot
The mounting knot is used to mount cords on a support, such as an anchor cord, so to begin a macrame project.
The mounting knot consists of a reverse lark’s head knot, with a lateral extension on both sides of a half hitch.
Execute a reverse lark’s head knot, as explained in the previous section.
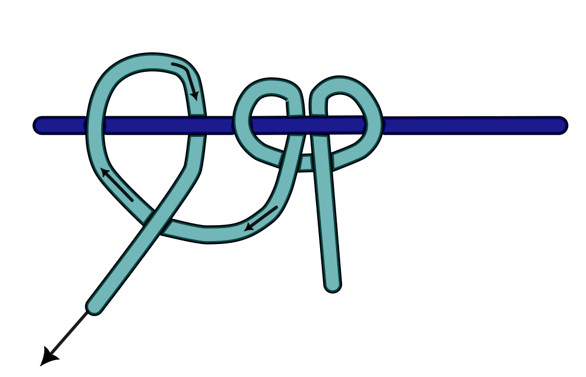
Then execute an half hitch on the left, as shown in the figure.
That is, turn the left knotting cord to the left upwards above the anchor cord, then downwards behind the anchor cord, inserting it into the loop formed.
Pull the knotting cord to tighten the knot.
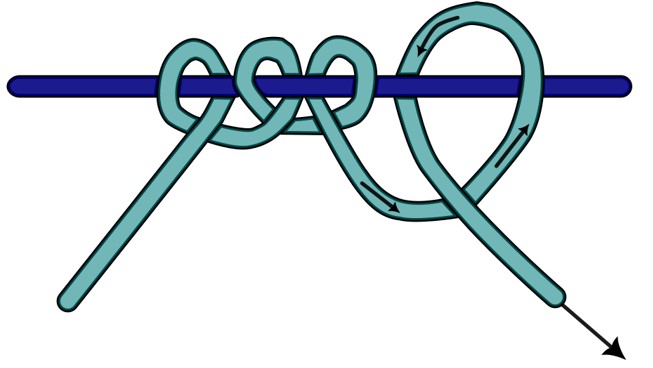
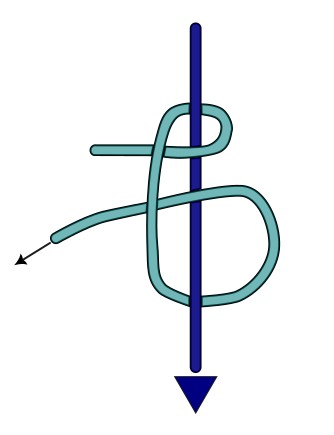
Extend now the other side by executing a half hitch on the right, as shown in the figure.
That is, turn the right knotting cord upwards over the anchor cord, then downwards behind the anchor cord, inserting it into the loop formed.
Pull the knotting cord to tighten the knot.
Double Half Hitch Knot
The double half hitch, together with the square knot, are the main actors of the macrame motifs. Half hitches can be also stapled to obtain for example the triple half hitch or sinnet of multiple half hitches.
Depending on the direction of the work, we talk about horizontal, vertical or diagonal double half hitch.
Horizontal Double Half Hitch
The anchor cord A and the knotting cord B have one free end and one blocked by the knots previously made.
The free end of anchor cord A faces right and the free end of knotting cord B faces downwards.
Bring the anchor cord over the knotting cord.
Turn the knotting cord left upwards, over the anchor cord, and then again downwards. Insert it under the anchor cord, as shown in the figure.
Pull the knotting cord to tighten the first half knot and to position it adjacent to the other knots.
Repeat the same movement, turning the knotting cord upwards, over the anchor cord, links. Then direct it downwards again, inserting it under the anchor cord, and over the bight formed by the knotting cord self, as shown in the figure.
Pull the knotting cord to tighten the knot and position it.
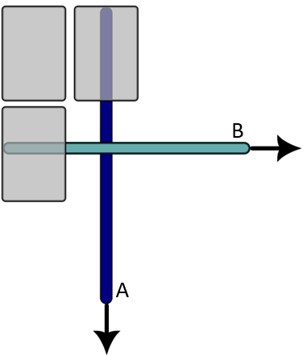
Vertical Double Half Hitch
The anchor cord A and the knotting cord B have one free end and one blocked by the knots previously made.
The free end of anchor cord A faces downwards and the free end of knotting cord B faces right.
Bring the anchor cord over the knotting cord.
Turn the knotting cord left upwards, over the anchor cord, and then again right. Insert it under the anchor cord, as shown in the figure.
Pull the knotting cord downward, to tighten the first half knot and to position it adjacent to the other knots.
Repeat the same movement, turning the knotting cord to the left, over the anchor cord. Then direct it to the right again, inserting it under the anchor cord, and over the bight formed by the knotting cord self, as shown in the figure.
Pull the knotting cord to tighten the knot and position it.
Diagonal Double Half Hitch
To orient ourselves here, we need a compass!
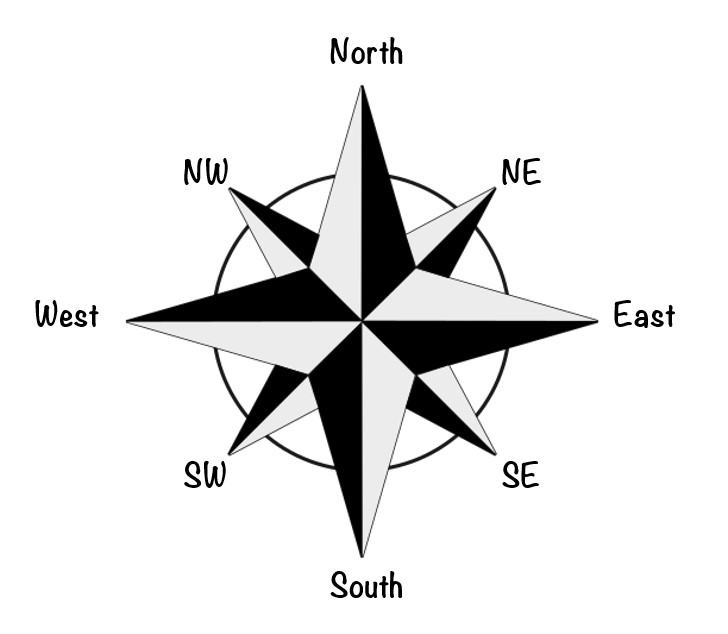
The anchor cord A and the knotting cord B have one free end and one blocked by the knots previously made.
The free end of anchor cord A faces southeast and the free end of knotting cord B faces southwest.
Bring the anchor cord over the knotting cord.
Turn the knotting cord toward North East, over the anchor cord, and then again toward South West. Insert it under the anchor cord, as shown in the figure.
Pull the knotting cord downward, to tighten the first half knot and to position it adjacent to the other knots.

Repeat the same movement, turning the knotting cord toward North East, over the anchor cord. Then direct it to the South West again, inserting it under the anchor cord, and over the bight formed by the knotting cord self, as shown in the figure.
Pull the knotting cord to tighten the knot and position it.
Reverse Double Half Hitch Knot
The reverse double half knot is what you see on the reverse side of a work done with double half knots. To execute it on the right side of the work, reverse the “below/above” position of the anchor knot with respect to the knotting cord.
The reversed double half knot is widely used in Friendship Bracelets (Do you know this site? friendship-bracelets.net)
Here is the explanation of a vertical reverse double half knot.
The anchor cord A and the knotting cord B have one free end and one blocked by the knots previously made.
The free end of anchor cord A faces downwards and the free end of knotting cord B faces right.
Bring the knotting cord B over the anchor cord A.
Turn the knotting cord left upwards and insert it under the anchor cord. Then again right oer the anchor cord, as shown in the figure.
Pull the knotting cord downward, to tighten the first half knot and to position it adjacent to the other knots.
Repeat the same movement, turning the knotting cord links, inserting it under the anchor cord. Then direct it to the right again, over the anchor cord and under the bight formed by the knotting cord self, as shown in the figure.
Pull the knotting cord to tighten the knot and position it.
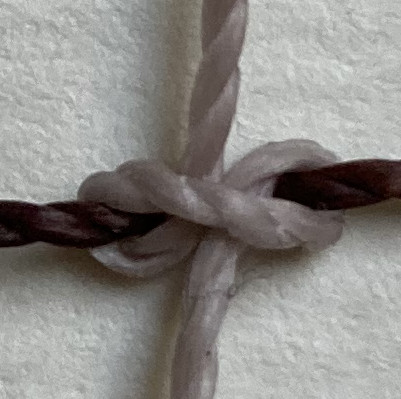
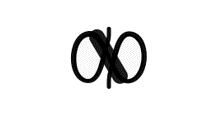
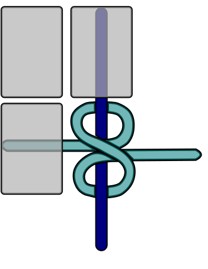
Tatting Knot
The Tatting knot is the main constituent of tatting lace.
In macrame it is used when, for example, you need to change direction of work, on the same row. Or in the execution of a simple sinnet.
Here we see it in its vertical processing.
We start with the anchor cord A directed downwards and working end of knotting cord B directed towards the right.
Bring the anchor cord B over the knotting cord A.
Turn the knotting cord to the left, upwards and insert it under the anchor cord, forming a loop.
Turn the knotting cord to the right again and pass it under the anchor cord.
Pull the knotting cord to tighten.
Turn the knotting cord to the left, over the anchor cord and insert it into the slot under the knotting cord itself, as shown in the figure.
Pull to tighten the knot.
The resulting knot will have the running end of the knotting cord in the opposite direction compared to that of origin, on the same row.
Square Knot
We explain here the square knot worked on four cords.
Depending on the macrame project, you may have more than two central cords.
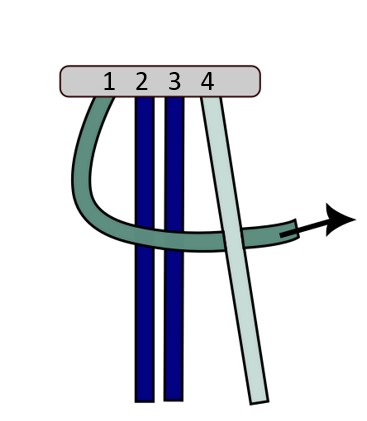
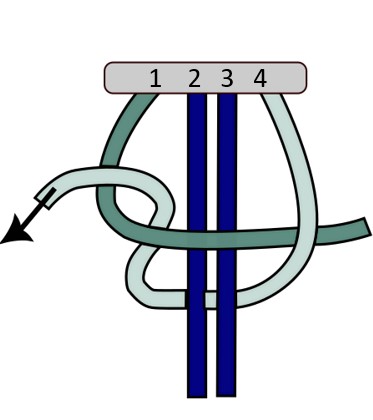
We start with four strands directed downwards.
The central ones, 2 and 3, are anchor cords. The side ones, 1 and 4, are knotting cords.
Take the knotting cord 1 and direct it to the right, over the two anchor cords and under the knotting cord 4.
Take the knotting cord 4 and direct it to the left, under the two anchor cords and insert its running end from below into the slot formed by the knotting cord 1.
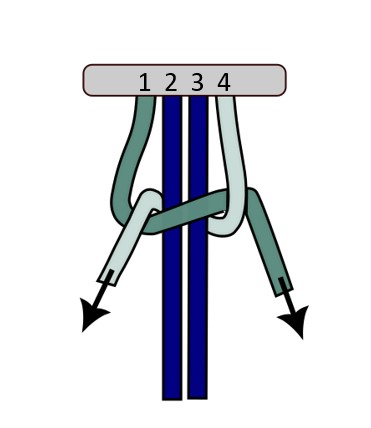
Pull both knotting cords 1 and 4 to tighten the flat half knot.
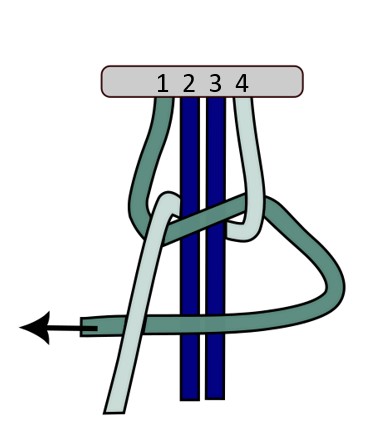
Take the knotting cord 1 which is now on the right, and direct it to the left, over the two anchor cords and under the knotting cord 4.
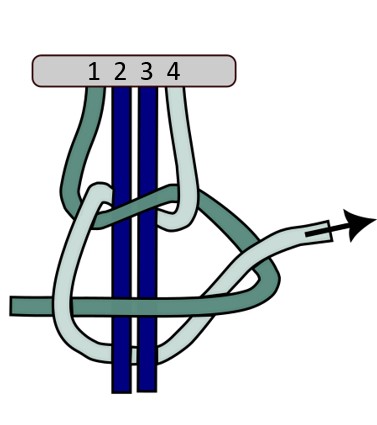
Take the knotting cord 4 which is now on the left, direct it to the right, under the two central anchor cords and insert its running end from below into the slot formed by the knotting cord 1.
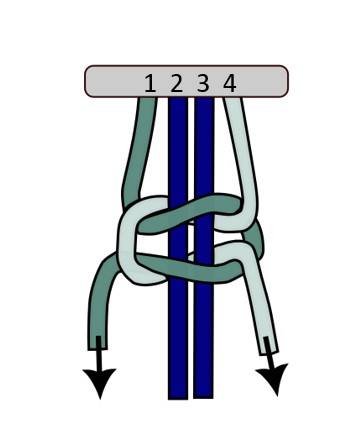
Pull both knotting cords 1 and 4 to tighten the flat knot.
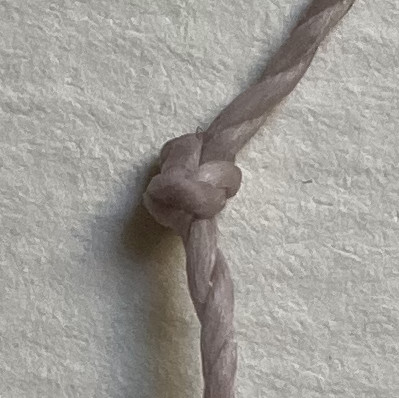
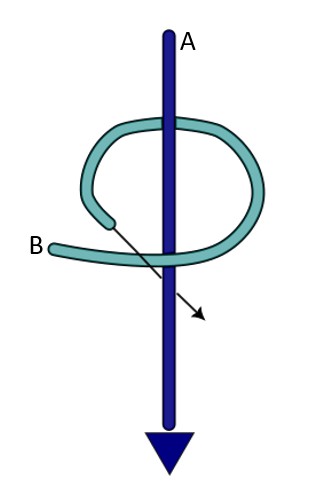
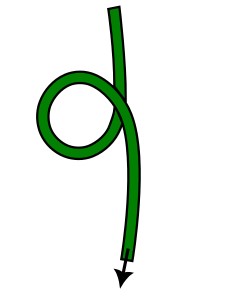
Overhand Knot
The simple knot is an auxiliary knot, which serves to stop the cords.
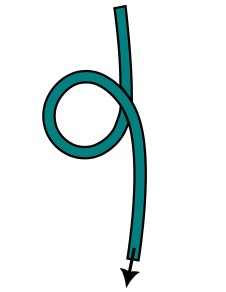
Form a closed loop with the cord.
Insert the end of the cord inside the loop.
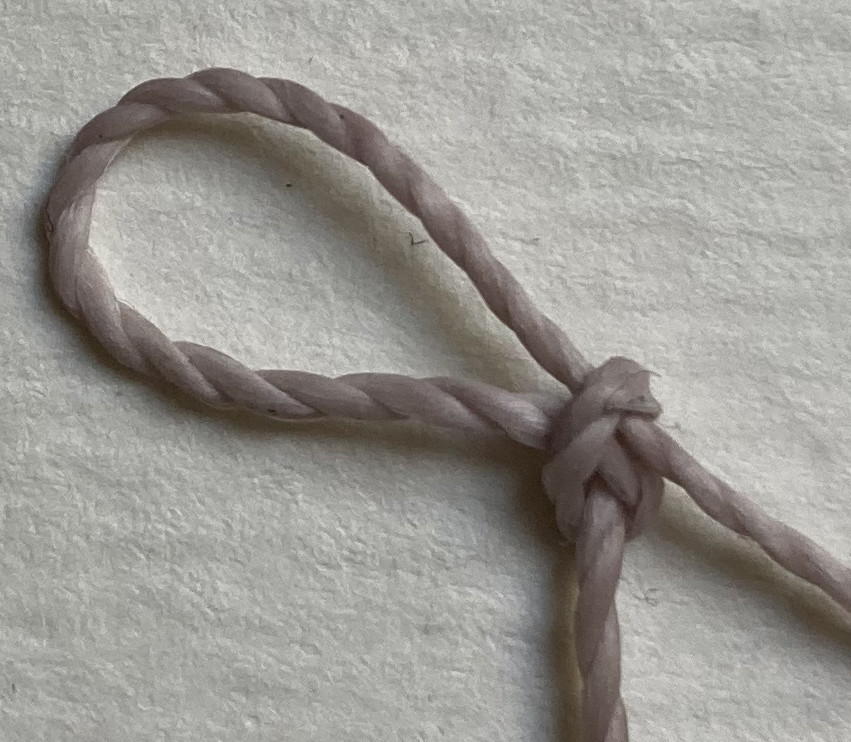
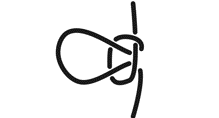
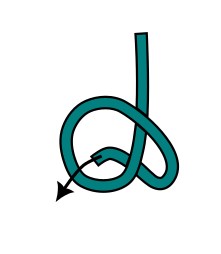
Slip Knot
The slip knot is an auxiliary knot, often used for fastening cords on the cushion or work table.
Form a closed loop with the cord.
With the running end, form a bight and pass it inside the loop to block it.
Tighten the knot around the bight.
